Add Savings Amounts for Quantity Pricing
Caution: this content was last updated over 4 years ago
Quantity pricing (also known as volume discounts) is native functionality within SuiteCommerce. While we show, by default, a table showing the pricing schedule for items on the product detail page, a common customization is to show information on the savings based on the currently selected quantity. While this is an interesting customization in itself, it also provides us a vehicle to discuss some of the ways we could implement this feature.
Accordingly, the two big things I want to focus on in this article are:
- The functionality itself
- Different approaches to customization
The functionality itself is rather straightforward. There are two values we want to derive, both of which can be ascertained by performing math on existing values (the base price and the 'current' price). The trick, however, is how we deliver this customization.
Firstly, the functionality here’s the text we’re going to add below the price:
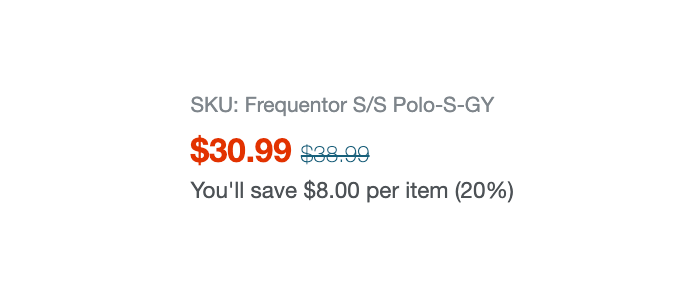
But it’s not static! It will update depending on the selected options and quantity. Allow me to demonstrate with a gif:
This product is set up with quantity pricing (also known as volume pricing or bulk discounts), which means that there is a predefined schedule of pricing: as the user increases the quantity of an item, the price goes down. By default, we illustrate this by striking through the base price and then highlighting the discounted price.
However, I was recently asked by a customer whether it was possible to show two additional bits of information:
- The price difference per item
- The saving amount as a percentage
The challenge from their perspective was that they didn't know the best way to access this data (it must be readily available if it's displayed on the PDP, right?), and they didn't know the best way to add these values to their pages.
What I felt was interesting about this topic is the second main thing I want to talk about: approaching customizations. A common theme in these articles is the discussion around how developers make changes to SuiteCommerce sites, which involves analyzing all the different ways to achieve your desired changes and the best practices that came out of it.
In my opinion, there are two main approaches for delivering customizations:
- As a site-specific customization
- As a package that can be applied to any site
Depending on the circumstances, these can be each considered best practice; therefore, the decision lies with the developer on how to best deliver it.
The first is generally applicable if you're someone who's focus is only on one site. Why spend all this time making your customization easy to distribute and interoperable with any site, if you know it's only going on to one site?
Well, that brings us to the second. I mean, how much work is it really? Also, what happens when you upgrade your SuiteCommerce source code to a new version? What's best for ensuring forward compatibility? After all, why wouldn't you want your new customization to be easily plugged/unplugged from a site? Why limit your customization to just one site? Of course, it's often not that simple, as I will illustrate with this functionality.
All the code mentioned in this article is available in GitHub.
Getting the Price Values
OK, so why does this discussion apply to this functionality? Remember our two new additional bits of information above? How do we calculate those? Well, here's the math:
- Price difference per item = base price - schedule price
- Saving percentage = (1 - (schedule price / base price)) * 100
That is simple enough. However, what is less simple is getting those price values in the first place. If you've played around with the PDP component in the extensibility API, then you'll think that it's just a case of reading those values from what's returned by getItemInfo(). While it is strictly true that all of these values are available in the returned object, they are not easy to get. In short, there's a lot of work that goes into calculating what is the shopper's base price and what is the schedule price.
Work to calculate these values take place in the product model and in ProductViews.Price.View. Rather annoyingly, some of the calculations happen privately in ProductViews.Price.View's getContext() method are not available via PDP.getItemInfo().
So, this raises the issue of how to add in this functionality: do we duplicate work and derive these values of ourselves, or do we find a way to access the existing values? Remember my two approaches above? Here's how they fit in with this functionality:
- Site-specific — add new properties (which are calculated based on existing context values) to the price view's context object (with
addToViewContextDefinition) and then update the theme template to display the values - Distributable package — create a new view that replicates the calculations that derives those values, and then add it (and a new template) as a child view to the price view
The second one is more code, but means it would be easy to distribute across sites. The first one locks the customization to the site as it requires a developer to implement, should you want to move it to another site. Crucially, it requires us to modify a file in a theme — which for some is very unattractive as many sites want to operate their site with a managed theme.
So, this begs the question: what's the best way to derive the values? I think we need to use a method that is available on the product model but not on the PDP component. You see, there's interesting nuance in the difference between what's returned from PDP.getItemInfo() and an instance of PDP's model. In order to make working with Product.Model easier, there are a lot of useful getter and setter functions available, many of which will be familiar because they mirror the methods available on the PDP component.
However, when you call getItemInfo() on the PDP component, these are all stripped out. If you look in the source of the ProductDetails.Component class, you'll see why. What's happening is that it is calling the current view (ie a product details view) and returning a 'deep copy' of it. However, deepCopy()'s definition changes throughout the source code, depending on the context (see Utils.deepCopy()) and, crucially for models, it points to our modified version of Backbone.Model.deepCopy(), which instructs it to return this.attributes.
Do you see what's happening here?
When we tell getItemInfo() to return the item's data, the source code has been instructed to return a shallow copy of the model's attributes property. A shallow copy means rather than duplicating the values, you create references to them. This is useful because it means that when the product model changes, so do the values returned from getItemInfo(). However, this is problematic for us in this case while we're copying the references to the model's attributes, we're not copying any of the super useful functions that are attached to the model.
I bring this up because one of the super useful functions in question is getPrice(). If we were to call this function on the model, we'd get back something like this:
{
  compare_price: 38.99
  compare_price_formatted: "$38.99"
  price: 34.99
  price_formatted: "$34.99"
}
By other names, compare_price is the base price, and the price is the current price based on the quantity and pricing schedule. Note that these are the 'live' values specific to the current shopper, and their current matrix option and quantity selections — these are the ones we would potentially have to potentially work out for ourselves.
So, should we make an exception and use application.getLayout().getCurrentView() in our code? On the spectrum of things, I wouldn't say that this is a terrible thing to do. We can do it easily when you add a child view, and from there, it's just a case of getting the model object. Ideally, something like getPrice() would be available on the PDP component, but it's not. This, I think, is worthy of an exception.
Older Code Versions
Now, of course, if you're not running the extensibility API, you won't have these headaches. There are two ways you can replicate the above approaches:
- Use
_.wrap()to generate the view'sgetContext()object, and then add new properties to it — then just make the necessary template changes - Modify the the price view's prototype to add in a new child view to its
childViewsobject
Then you would either edit the price view template to add the necessary markup to either show the new context values, or to add a placeholder for the child view. You could alternatively use the plugin container functionality to post-process the template to add in the necessary changes.
Both of these are considered acceptable customization methods if you don't have access to the extensibility API (but the API should be preferred when available).
The Code
Rather than generate separate files for each combination of options, I've created a module that has a little switch in it so you can see the different methods in operation.
Here's the entry point file:
define('CodeSample.SavingsPrice.SavingsPrice'
, [
    'underscore' // Only required if you're using option 1
  , 'ProductViews.Price.View' // Only required if you're using option 2 or 3
  , 'PluginContainer' // Only require if you're using option 3
  , 'CodeSample.SavingsPrice.SavingsPrice.View'
  ]
, function
  (
    _
  , PriceView
  , PluginContainer
  , SavingsPriceView
  )
{
  'use strict';

  return {
    mountToApp: function mountToApp (container)
    {
      var PDP = container.getComponent('PDP');

      // Set to 1 if you want to use this an edit to your template
      // Set to 2 if you want to use a separate view and template
      // Set to 3 to use pre-extensibility customization methods
      // This is obviously just for demonstration purposes, don't include it in your final code
      var option = 1;

      if (PDP && option != 3)
      {
        if (option == 1)
        {
          PDP.addToViewContextDefinition('ProductViews.Price.View', 'savingsPrice', 'string', function (context)
          {
            return _.formatCurrency(context.comparePrice - context.price)
          });

          PDP.addToViewContextDefinition('ProductViews.Price.View', 'savingsPricePercentage', 'string', function (context)
          {
            // Note that using Math.floor eliminates decimal places and rounds down. If you require more precision, you can use something like toFixed(2) instead
            return Math.floor((1-(context.price / context.comparePrice)) * 100) + '%'
          });

          /*

          Add the following to product_views_price.tpl in the {{#if showComparePrice}} blocks:

          <p>{{translate 'You\'ll save $(0) per item ($(1))' savingsPrice savingsPricePercentage}}</p>

          */
        }

        else if (option == 2)
        {
          PDP.addChildView('Product.Price', function ()
          {
            return new SavingsPriceView({application: container})
          });
        }
      }

      else if (option == 3)
      {
        // This option is what you would do if you don't have access to the above two methods
        // The main customization is the modification of the price view prototype to add to the childViews object
        // Instead of adding a new child view, you could also just add new properties to the view's context object
        PriceView.prototype.childViews = PriceView.prototype.childViews || {}

        PriceView.prototype.childViews.SavingsPriceView = function ()
        {
          // One of the things that's quite different about the `addChildView()` method on components in the extensibility API, and adding new views directly to the `childViews` property of a view is anything you pass to the constructor in `addChildView()` gets added to the view instance's `options` object; whereas anything you add to the constructor of a view passed into `childViews` gets added automatically as those properties.
          // In other words, the following method lets us set the `application` and `model` properties directly, whereas we have to set them in the view file after passing them in as options.`
          return new SavingsPriceView
          ({
            application: container
            // Because we're extending the view object the scope of `this` gets set to the class itself, which means that we don't need to faff around trying to set it: we can just pass it on from the price view
          , model: this.model
          })
        }

        // The plugin container can be used to modify a view's template at various stages of compilation or rendering.
        PriceView.prototype.preRenderPlugins = PriceView.prototype.preRenderPlugins || new PluginContainer();

        PriceView.prototype.preRenderPlugins.install
        ({
          name: 'SavingsPriceContainer'
        , execute: function ($el, view)
          {
            $el
              .find('.product-views-price-old')
              .after('<div data-view="SavingsPriceView"></div>');
            return $el
          }
        });
      }
    }
  }
});
I put in a bunch of code comments to explain what's going on.
Option 1: Add to an Existing View's Context Using the Extensibility API
So, to reiterate, my preferred approach is to modify the existing view's context object to add new values. For that, we're using addToViewContextDefinition(), which is a method available on a number of components.
After specifying the view we want to modify, the name of the new property and its type, we can use the existing object (if required) to define the value of our new property. We do this twice, once to derive the savings amount and then again to calculate the percentage. Note that we're using a utility method called formatCurrency() which is in the Utils module but bound to _, which takes a numerical value and displays the correct currency symbol for the user.
As this is adding new variables values to an existing template, we then have to edit the existing template to add some markup to render them. For that, I'm putting it in the {{#if showComparePrice}} conditional blocks in product_views_price.tpl below the 'old' price.
Of course, if you've got an untouched/managed theme, you probably don't want to use this customization method as it would require you to edit templates. If you're not keen on editing templates then the next approach is for you.
Option 2: Add a New Child View Using the Extensibility API
The second approach is to add a new child view to the view, rather than modify the view's context object. This has the benefit of being easier to distribute, but it means that there's more code involved (as we need to create a view) and we are also going to rely on an unconventional way of getting access to the full model of the view.
Therefore, for that we need to include a child view such as the following:
// This view is only required if you're adding a new child view, and not adding new properties to the view's context object
define('CodeSample.SavingsPrice.SavingsPrice.View'
, [
    'Backbone'
  , 'underscore'
  , 'codesample_savingsprice.tpl'
  ]
, function
  (
    Backbone
  , _
  , codesample_savingsprice_tpl
  )
{
  'use strict';

  return Backbone.View.extend({
    template: codesample_savingsprice_tpl

  , initialize: function initialize (options)
    {
      this.application = this.application || options.application;
      this.model = this.model || this.application.getLayout().getCurrentView().model;
      this.model.on('change', this.render, this);
    }

  , getContext: function getContext ()
    {
      // This block is borrowed from ProductViews.Price.View, which is one of the reasons why I am not in favour of using a separate view as the customization method
      var price_object = this.model.getPrice()
    , showSavingsPrice = !!(price_object.min && price_object.max)
      ? price_object.max.price < price_object.compare_price
      : price_object.price < price_object.compare_price;

      return {
        savingsPrice: _.formatCurrency(price_object.compare_price - price_object.price)
      , savingsPricePercentage: Math.floor((1-(price_object.price / price_object.compare_price)) * 100) + '%'
      , showSavingsPrice: showSavingsPrice
      }
    }
  })
})
In the initialize(), we need to do two things: add the application and model properties, and then create an event listener. The two new properties basically check to see if they exist already, and, if they don't, then we set them. The application was passed in as an option when we constructed the view, but we set the model here by getting the current view from the the layout and using that. (In case you're interested, we add the model here — rather than passing it an as object to the constructor — because getLayout() won't return anything in the entry point file, but it will when called a view.)
Once we have the model, we listen for any changes to it (eg quantity changes) and then tell it to re-render this view if it does change.
Finally, we then do the laborious exercise of calculating the values for the context object. I've borrowed code from ProductViews.Price.View to help us get there. Again, this is one of the reasons why I am not keen on this approach: we have to work with the price object directly and copy core code, rather than re-use it. In other words, although unlikely, something could change in the future that breaks the customization.
Option 3: Pre-Extensibility Approaches
As I mentioned above, both of the aforementioned approaches are reproducible in pre-extensibility code. You should be able to work it out, but I've included one in the entry point file: adding a child view. I included it because it also includes a customization approach that lets you modify template code on-the-fly.
The plugin container functionality is not really best practice any more (to be honest, it never really was!) but it lets you modify a view's template code at various stages in its rendering process. Typically, if you're going to add some markup then you'll do it before rendering starts.
It is also not required as you can just edit the templates directly to add in the container for your new child view. But I included it as a curiosity because it helps when it comes with packaging up the customization.
You can see that we start by modifying the prototype of the price view to add a new child view. Then, in our constructor, we pass it the application and model. Note that as we are executing this constructor in the context of the price view (because we are modifying its prototype) the value for this becomes the price view itself. Therefore, we don't need to pull any shenanigans to get this value: we can just pass it on straightaway.
Furthermore, unlike the addChildView() extensibility method, when you pass in your values to the constructor, it adds them directly to the instantiated view, rather than passing them in the options object. This is why we have code in the savings price view's initialize() method that checks whether it exists first or not; if we're adding the view directly to the childViews object, then we don't need to add it in the child view itself.
Add the Template Code
Finally, once we have the values, we need to show them on the frontend. Regardless of how you're delivering this customization, there is some new template code. However, it varies on which option you're implementing.
For option 1 (adding new context values), you'll only need this:
<p>{{translate 'You\'ll save $(0) per item ($(1))' savingsPrice savingsPricePercentage}}</p>
For the others, you need this:
{{#if showSavingsPrice}}<p>{{translate 'You\'ll save $(0) per item ($(1))' savingsPrice savingsPricePercentage}}</p>{{/if}}
The difference is because in the first option, we are adding to an existing view and template that already has checks on whether to show the markup; the second does not, so we need to add it.
The three customization approaches above deliver this template code in different ways:
- Adding to the view's context object — edit product_views_price.tpl in your theme and add it in
- Adding a new child view — create a new template (called codesample_savingsprice.tpl) and it in there
- Inject it using the plugin container — modify a view's template code during its rendering process and inject the required template code into position using jQuery
I don't recommend the third one, especially on sites which has access to the extensibility API.
Code samples are licensed under the Universal Permissive License (UPL), and may rely on Third-Party Licenses