Add a New Custom Entity Field to the Registration Form
Caution: this content was last updated over 4 years ago
One of the things I get most excited about in new releases of SuiteCommerce and SuiteCommerce Advanced is when there are improvements to the extensibility API. 2019.1 contains such improvements and I want to focus on three of them now:
- LoginRegisterPage
- UserProfile
- MyAccountMenu
There was a fourth component that we added, PageType, but that's such a big topic that I don't want to get into it here.
The first two components have a fair bit of synergy; and the third is quite small and can be illustrated as part of this example, which is what I'm going to do. Before I dive into the code, let me talk about how we intend for these components to be used, what they offer, and how I'm going to cobble them together into a coherent tutorial.
I strongly recommend reading through the new components, and their methods and events, in the API documentation.
LoginRegisterPage
This component aims to do two things:
- Make it easier to add new fields to the login and registration forms so you can capture custom field data
- Enable you to add custom code that fires before login/registration, or after registration
An easy illustration of this might be when the business wants to get their customers to formally agree to some terms and conditions before registering, and that's what we're going to do.
Note that the new component does not add any new unique methods — but it does inherit them from its parent components. In other words, the ability to add new fields to the forms is not a unique feature of this component. It is, however, enabled by changes we have made to the base theme in 2019.1, which should be added to your theme if you want to use them in a theme not created with the 2019.1 base theme.
- login_register_login.tpl —
<div data-view="Login.CustomFields"></div> - login_register_register.tpl —
<div data-view="Register.CustomFields"></div>
By default, we put these below the standard fields but you can put them anywhere within the form, but just consider the user experience. Individual fields can be moved with JavaScript, but that's not very good practice so I'd suggest only doing it if you know what you're doing.
Note that it's only available on the login/registration page.
UserProfile
This component lets you access data about the current user — it's enhanced if they're recognized or logged in.
The crucial method for this component to work is getUserProfile(), which returns a promise but can be chained with standard jQuery deferred object methods, such as deferred.then(), to produce workable results. In other words, once the jQuery promise is resolved, it will return an object of the current user's details.
For advanced users, this can be thought of as a wrapper for Profile.Model.getInstance(), but it returns a slightly different object (notably, for example, in the component's object, property names are returned in lowercase and properties with null values are not returned, and T and F values are converted to true and false respectively).
Useful features that the user profile object has include:
- The
isguest,isrecognized, andisloggedinproperties for determing the status of the current user's session (eg to show a greeting or render some view) - The
typeproperty, which returns what different values based on whether a user is an individual or business contact (useful for sites that are both B2B and B2C) - The
customfieldsproperty, which returns a collection of all the user's custom fields
It's that final feature that we're going to be taking advantage of: setting a property on the registration form, and then accessing its value later on using this component.
Unlike the previous component, this one is available throughout all three applications.
MyAccountMenu
While you could always add new functionality to the customer's account area, it was a bit more difficult to modify the navigation menu to link to any new pages you created. This component changes that and makes it super easy.
It has two methods: one to add new groups, and one to add new entries to those groups.
This is a pretty straightforward component, and it's most notable feature is that you can specify a permissions set for the groups and items. Using standard NetSuite permissions, you can prevent the entries and groups from showing unless the current user meets your specified requirements. For example, if you're adding custom returns functionality, and you only want certain customers accessing it, you could use the TRAN_RTNAUTH permission, with a level of 2 (ie the ability to create returns) in both the customer role and the extensibility API when you create the new entry/group.
Note that as of 2019.1, it does not let you edit or remove existing items or groups, nor does it modify the contents of the top menu. These changes may or may not come in future releases.
I'm including it in this tutorial because it's a small thing that can be tenuously attached, so let's do that!
Project Brief
OK, as I said, I'm going to fit all of these new features together.
The general idea is that a hypothetical company's legal team wants to make sure that new users have read and agree to the site's terms and conditions before they register an account on the site. In order to do this, they want to capture agreement on the registration form with a checkbox.
The terms and conditions will be available on the site in the form of a static landing page that the user can (must!) read. Finally, they want to check that the logged-in user has the information available to them, so they want us to add a new section to the customer's account which shows whether they have agreed or not. This needs to be accessible from the navigation menu.
I should point out that this implementation will not physically prevent a shopper from using the site until they agree to the terms and conditions — this is just an illustration / proof of concept. If your legal team requires this, you will need to create a more robust solution; for example also adding the field to your checkout or otherwise ensuring that the custom field is set to true before the order can be submitted. If I were to implement this, I feel I would be getting too far down a rabbit-hole, so let's just leave it as it is, yeah?
I should also point out that there is separate functionality for (typically) B2B sites to do with terms and conditions. It is tied to the invoice payment method, and is enabled through configuration. Again, this tutorial is a proof-of-concept, so you should consider how it impacts this feature, if you do decide to implement it.
Supplementary Setup
Before we do cool coding stuff, we need to do some basic prep work:
- Create a custom entity field to store when a user agrees to the terms and conditions
- Put the terms and conditions in a landing page using the site management tools
Create Custom Entity Field
We need this field to store the data about the user.
Go to Customization > Lists, Records & Fields > Entity Fields > New to create a new field as follows:
- Label — Terms and Conditions
- ID — _tsandcs
- Type — Checkbox
- Store Value — (checked)
- Applies To > Customer, Web Site — (checked)
Save it.
Create the Landing Page
Visit your site's frontend and then launch the site management tools (usually by pressing Esc). When they load, click the Overview icon (the left icon in the center of the header). Click on Pages > New and create it as follows:
- Name — Terms and Conditions
- Heading — Terms and Conditions
- Path — /terms-and-conditions
Everything else can be left to default, or set how you want.
In the SMTs, preview the page and then go to edit mode. Using the Add button, add content to the page. For example, for my page I'm just going to drag a CMS Text content block on to the main This Page CMS placeholder block. In it, I'm just going put some dummy lorem ipsum text.
Save and publish your pages. When you visit the page URL on the frontend, you should see the page load.
Create the Baseline Extension
Before we begin, you should update your extension developer tools for the latest version (so if you haven't already got the ones for 2019.1 or newer, make sure you grab them and set them up first).
As with all extension development, it's good to get a skeleton set up first so that we can be sure that we've got the basics sorted out.
In a terminal window, move to the top-level directory for your extension developer tools and use the Gulp command gulp extension:create to create a new extension. This is the best practice way of creating a new extension, but you could create yours from scratch if you wish.
In the wizard that appears, set it up as follows:
- Extension Fantasy Name — Terms and Conditions
- Extension Name — TermsAndConditions
- Vendor Name — Example
- Version Number — 1.0.0
- Description — Adds a terms and conditions checkbox to the registration form
- Supports — SuiteCommerce Online
- Module Name — TermsAndConditions
- Applies To — Shopping, My Account, Checkout
- Using — JavaScript, Templates, Sass
When it runs, it'll create a bunch of files and then prompt you with the additional steps you need to take. The only important one right now is the one that fetches the active theme and extensions, so do that.
Finally, once that's done, you can run the Gulp local server (gulp extension:local) and test out the baseline extension and make sure it works. After it finishes, visit your local site and you see the example "Hello World!!" message in the header.
Add a Field to the Registration Form
The first area I'm going to look at is adding a new field to the registration form, so we can get new customers to confirm they've read the terms and conditions.
One of the interesting features of extensions is that you can run different code depending on the application (ie, Shopping, Checkout or My Account). To do this, you can either write the code so that it fires based on specific markers, or — and this is my preferred option — having different entry point files for each application.
If you look in your extension's manifest.json file, you will see that a number of objects are broken down into the different applications. At the moment, your extension is configured to run the same files in each one, but you can change that by changing the values in the entry_points objects for sass and javascript. Note that this isn't possible for templates and SuiteScript, and that you do not need to update every object: running gulp extension:update-manifest will rebuild the file path objects for each application based on what you include in your entry points.
Create a Checkout JavaScript Entry Point
The easiest way to start this is to simply duplicate the existing entry point file and rename it. Do so, naming it to Example.TermsAndConditions.TermsAndConditions.Checkout.js.
Now we need to prepare it for use. There are two crucial things we need to do:
- Check for and get the LoginRegisterPage component
- Use it to add a new view to the custom fields placeholder in the registration form
To that effect, replace the code with:
define('Example.TermsAndConditions.TermsAndConditions.Checkout'
, [
    'Example.TermsAndConditions.TermsAndConditions.LoginRegister.View'
  ]
, function
  (
    TermsAndConditionsLoginRegisterView
  )
{
  'use strict';

  return  {
    mountToApp: function mountToApp (container)
    {
      var LoginRegisterPage = container.getComponent('LoginRegisterPage');

      if (LoginRegisterPage)
      {
        LoginRegisterPage.addChildView('Register.CustomFields', function ()
        {
          return new TermsAndConditionsLoginRegisterView
          ({
            LoginRegisterPage: LoginRegisterPage
          })
        });
      }
    }
  };
});
We've added a dependency: a yet uncreated view that will render the template that contains the form field.
We also get the component and, if it exists, we use the standard addChildView() method to add a new child view. We pass it the new view and that's it. We don't need anything more complicated than that.
Finally, before we move on, use this opportunity to make a change in the manifest so that the application knows to load this view. In manifest.json, change the value of the JavaScript entry point file for the checkout application to point to this file; ie:
"javascript": {
        "entry_points": {
            "checkout": "Modules/TermsAndConditions/JavaScript/Example.TermsAndConditions.TermsAndConditions.Checkout.js"
        },
Create the View to Render the Template
So, we need to create a special view just for the checkout area of the site which renders a new field in the registration form.
In the JavaScript folder, create Example.TermsAndConditions.TermsAndConditions.LoginRegister.View.js and create something nice and simple like this:
define('Example.TermsAndConditions.TermsAndConditions.LoginRegister.View'
, [
    'Backbone'
  , 'example_termsandconditions_termsandconditions_loginregister.tpl'
  ]
,  function
    (
    Backbone
  , example_termsandconditions_termsandconditions_loginregister_tpl
  )
{
  'use strict';

  return Backbone.View.extend({
    template: example_termsandconditions_termsandconditions_loginregister_tpl
  });
});
Super simple: render a template. We don't need anything else to happen.
Create the Template to Render the Form Field
Speaking of the template, let's create it now.
In Templates, create example_termsandconditions_termsandconditions_loginregister.tpl and in put:
<div class="login-register-register-form-controls-group">
    <label id="login-register-register-custentity_tsandcs" class="login-register-register-form-label">
        <input type="checkbox" name="custentity_tsandcs" id="custentity_tsandcs" value="T">{{translate 'I have read and agree to the <a data-touchpoint="home" data-hashtag="#/terms-and-conditions">Terms and Conditions</a> of this site'}}
    </label>
</div>
Some key things to keep in mind for this field:
- As we are adding in a field to an existing form, we should use existing styles where possible (this cuts down on work and unnecessary code, and ensures consistency) — so note the familiar looking class names.
- The
nameproperty on any input field must match exactly the ID in NetSuite that it corresponds to (theidproperty on the form does not, but it can be useful for identifying it for other uses). - The
valueproperty for checkboxes must be set toTbecause that is the value fortruein NetSuite. This is important because the default HTML value for a checked checkbox ison, and setting a value in thevalueproperty overrides will override it.
Also note what we've done with the anchor tag (or, rather, not done): you'll see we haven't set an href and have instead set values for data-touchpoint and data-hashtag. The static page is available on the shopping application part of the site, and so we need to trigger a change in application to visit it. To do this, we add in two parameters (and omit the href): one to set the destination touchpoint (home) and the other to set the hashtag (#/terms-and-conditions). What we're effectively saying is, "Go to the shopping application and visit the terms and conditions URL". The single-page application figures out the rest.
Save and Test
We should now be in a state to test everything. Save all your open files. If you have your local server running already, you'll need to kill it and restart it (so that it becomes aware of the new files we just added).
Once it's up, visit your site's login/registration page and then visit the local version of it by modifying the URL so that checkout.ssp becomes checkout-local.ssp. When it reloads, you should see the new field appear in the custom fields placeholder space for the registration form:
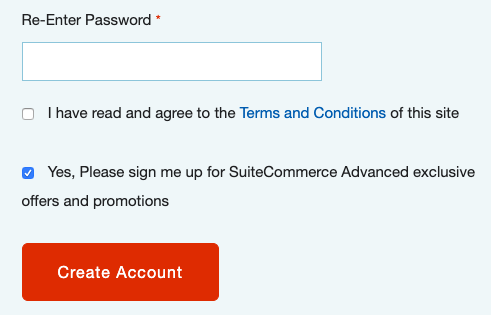
If you don't see the new field, do some troubleshooting like:
- Check the placeholder exists in your theme (it is a div with the property
data-view="Register.CustomFields") — we added this is in the 2019.1 theme so make sure your theme is up-to-date - If it exists but is empty, make sure your code is not throwing any errors and matches what I've got above
- Have you stopped and restarted your local server?
- Check your manifest has all the files we just added — stop your server and run
gulp extension:update-manifest
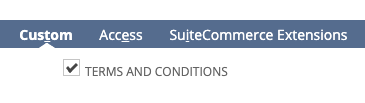
Now, if you fill out the form, check the new box, and then submit it, you'll see that it works and that it updates the field in the Custom tab of the new (lead) record created by this form. Woohoo!
Add Validation via Cancelable Events
But, there is one crucial thing that we have missed out: validation. Validation is where you perform a basic check on a field's value to make sure it's what the system is expecting. There are numerous blog posts and docs about validation, including those available from the library provider. However, there are crucial differences with code implemented through the extensibility API.
NetSuite doesn't allow you to create checkbox custom fields that are mandatory, and with good reason. As it's a binary choice (checked/unchecked), you can't really mandate that they set a value like you can with text fields or dropdowns. Therefore, if we want the ensure that the user agrees to our terms and conditions, we need to render it on the page unchecked and then prevent them from being able to submit the form without checking it first.
Normally, when you introduce new fields you will extend the model's validation object with a new object for your new field, containing all the rules you want followed. However, we don't encourage the modification of our core classes in extensions; this is considered bad practice because you are building a direct dependency to something that may change in future versions, or behave differently on other people's sites.
We do, although, offer validation for extensions through cancelable events. These are a brand of events available through the API that fire before an event is processed fully. In our example, we're going to use the beforeRegister event which means that we will interrupt the registration flow after the user has clicked the submit button but before the majority of the core code runs (ie, before it is sent to the server).
Thus, it is here that will we add in our validation, albeit unconventionally.
Edit the View
At the moment, our view is very simple but we can now build it out a bit for the validation. We need to achieve a few things here:
- Add a listener for the
beforeRegisterevent - Within the listener's callback, we need to check whether the field is checked
- If the field is unchecked, we need to show an error and cancel the submit event
- Bonus UX feature: hide the error message once a user clicks the checkbox
To speed things along, I will give you the full code of the view and then talk through each change afterwards.
Change Example.TermsAndConditions.TermsAndConditions.LoginRegister.View.js to:
define('Example.TermsAndConditions.TermsAndConditions.LoginRegister.View'
, [
    'Backbone'
  , 'jQuery'
  , 'example_termsandconditions_termsandconditions_loginregister.tpl'
  ]
,  function
    (
    Backbone
  , jQuery
  , example_termsandconditions_termsandconditions_loginregister_tpl
  )
{
  'use strict';

  return Backbone.View.extend({
    template: example_termsandconditions_termsandconditions_loginregister_tpl

  , events:
    {
        // Optional UX feature: when a user clicks on label/input it will trigger the built-in function to hide any errors attached to this element (see ErrorManagement.js)
        'click #login-register-register-custentity_tsandcs': 'hideError'
    }

  , initialize: function ()
    {
        var self = this;

      this.options.LoginRegisterPage.on('beforeRegister', function (formFields)
      {
        // Unchecked checkboxes are not included in the data object, so we need to check they exist
        if (!formFields.custentity_tsandcs)
        {
            // All views have the ability to render error messages via ErrorManagement.js.
            // By default, they will automatically find the nearest alert-placeholder, so our template needs one.
            self.showError(_.translate('You must accept the terms and conditions to register an account'))
            return jQuery.Deferred().reject()
        }
      });
    }
  });
});
The big changes happen in our new initialize() method. Using this method means that any code within this block will run when a new version of this view is created. After setting a useful context-saving variable for ourselves, we run code on the LoginRegisterPage component that we passed to the view from our entry point file (anything you pass in the view's constructor object is added to instantiated view's options property).
As mentioned, we are creating a listener using beforeRegister so that our new code will run before the rest of the registration code runs. Note that we're passing all of the form's fields as an argument, which is how we can perform our validation on specific fields.
Within the callback code, we perform our check. Now, there's a little bit of nuance here. Unchecked checkbox fields are not included in the form fields object that is processed on submit, but other fields are (for example, empty text fields are sent through with an empty string value). Therefore, the best way to check for unchecked boxes is to simply check whether the object has our property in it — and then, because we need this value to be true for the if to trigger, we negate it with a !.
Once we have that, we run our code. The first triggers an error message to show. You might not know this, but we have built-in error management features and one of the things they enable you to do as developers is to easily trigger error messages on any view. I won't go into detail about how they work (check out the ErrorManagement module in the source code, if you have access) but there is a showError() method attached to all views that trigger error messages to show. It only requires one thing: a message in its first argument (it accepts other arguments, but they are not required, so I have omitted them).
Then, finally, we must do something that interrupts or 'cancels' the event from going any further. There are two things you can do here: throw an error, which is not user-friendly at all, or return a rejected deferred object, which cancels it silently allowing us to tack on our user-friendly error message.
On the subject of the error message, we added an object for our events and added a new one to it. What we are doing is listening for when a user clicks on #login-register-register-custentity_tsandcs (which is the ID we assigned to the label element in our template); when triggered, it will run the hideError() method which is another useful feature added by the ErrorManagement module. It does what it says: hides the error. In other words, if the error shows and then the user goes to correct their mistake by checking the new checkbox, we will hide the error message. Nice.
Now, if you were just to run this code it would work but it would render the error message in the wrong place: the code is set up to find the nearest alert placeholder, which is currently at the bottom of the standard registration fields. This would look out of place, as error messages should appear directly below the problematic fields. But don't worry, this is easy to fix.
Edit the Template
Open up example_termsandconditions_termsandconditions_loginregister.tpl and change it to:
<div class="login-register-register-form-controls-group">
    <label id="login-register-register-custentity_tsandcs" class="login-register-register-form-label">
        <input type="checkbox" name="custentity_tsandcs" id="custentity_tsandcs" value="T">{{translate 'I have read and agree to the <a data-touchpoint="home" data-hashtag="#/terms-and-conditions">Terms and Conditions</a> of this site'}}
    </label>
    <div class="login-register-register-custentity_tsandcs-messages" data-type="alert-placeholder"></div>
</div>
The change is that we now have a div with data-type="alert-placeholder" attached to it. This is the new place where the error message will be shown when if it triggers on the field.
Save, Test, and Tidy Up
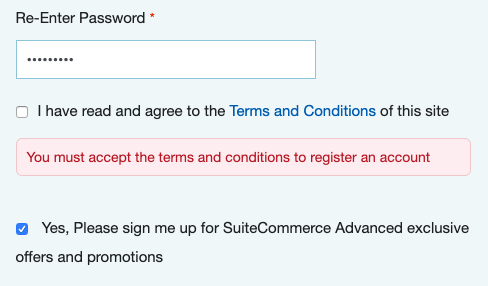
Save the file and then head back to your page and refresh. Make sure you're looking at the local version of the page. Now, try to register a new account without having first checked the box and you should get your error message, showing in the right place, which also prevents the user from submitting the form.
Check the box after it errors: does it clear the error message? When you submit with all required fields, does it update the user record in NetSuite?
If everything is fine, then that completes the first part of this project. If that's all you need, you can stop things here, although you will need to tidy up your code a bit. For example, we left the default/bootstrapped extension code in our extension, so you'll need to delete the code that renders the "Hello World!" message in the header bar. Thus:
- In JavaScript/Example.TermsAndConditions.TermsAndConditions.js, remove the dependencies, and empty the contents of the
returnstatement — by keeping this file (and in the manifest), but emptying it all of actionable code, we're essentially saying that we don't want any code to run in the shopping application - Delete JavaScript/TermsAndConditions.View.js, as it is no longer being used
- Delete Sass/_termsandconditions-termsandconditions.scss, as it is no longer being used
- Delete Templates/example_termsandconditions_termsandconditions.tpl, as it was never used
Essentially, the only files you should have left are the ones mentioned throughout the tutorial. If there are any other stock files that got created as part of the wizard, you can delete those too.
Once you've done all that, and done a quick check on your local server (remember to stop and restart the server), you can push it up to NetSuite and activate. Just remember what I said earlier: this isn't a complete solution, so make sure you modify it to fit your organization's needs.
If you're stuck and want to see my code, you can see it in GitHub.
User Profile Data Brief
So, the second part of this tutorial looks at how we can access user profile information using the new UserProfile component. Here are the crucial things to keep in mind when dealing with it:
- It is available throughout the entirety of the site
- If the current user is logged in, it will return more data
- If a property doesn't have a value (or has a null value), it is removed from the object
- It returns a promise, so you must chain handlers to the deferred object to use its data
- It is read-only (at least, at the time of writing anyway), so if you want to update data, you will need to use methods outside of the extensibility API
Remember, the brief here: we want to add a new section the customer's account area so that they can view whether they've agreed to the site's terms and conditions, and we want that to be accessible via a link in the area's navigation menu.
Add a New Page to the My Account Area
Let's start by creating the place in the user's account where they can view the value of the custom field. To do this, we will need to:
- Create an entry point file just for the My Account application
- Create a router to handle the route (URL fragment)
- Create a view for the router to render
- Create a template that shows the value of the custom field
Create the Entry Point
Just like we did for the checkout, we're going to create a separate entry point file for the My Account application. This will allow us to run code in only that area of the site, as well as keep our code nice and tidy.
In the JavaScript directory, create Example.TermsAndConditions.TermsAndConditions.MyAccount.js with the following code in it:
define('Example.TermsAndConditions.TermsAndConditions.MyAccount'
, [
    'Example.TermsAndConditions.TermsAndConditions.MyAccount.Router'
  ]
, function
  (
    TermsAndConditionsMyAccountRouter
  )
{
  'use strict';

  return {
    mountToApp: function mountToApp (container)
    {
      return new TermsAndConditionsMyAccountRouter(container)
    }
  };
});
Nice and simple: put a (soon to be created) router as a dependency and then return a new instance of it, passing it the container object.
After saving, head over to your manifest file and update the path of javascript : entry_points : myaccount so it points to the new special entry point file we just created.
Create the Router
The router is what handles the page when a user hits a particular URL fragment. In our case, we need a new router because we want to add a new URL path to our application — and we want it to show a view when that happens.
Create JavaScript/Example.TermsAndConditions.TermsAndConditions.MyAccount.Router.js and in it put:
define('Example.TermsAndConditions.TermsAndConditions.MyAccount.Router'
, [
    'Backbone'
  , 'Example.TermsAndConditions.TermsAndConditions.MyAccount.View'
  ]
, function
  (
    Backbone
  , TermsAndConditionsMyAccountView
  )
{
  'use strict';

  return Backbone.Router.extend({
    routes:
    {
      'update-terms-and-conditions': 'termsView'
    }

  , initialize: function (container)
    {
      this.application = container;
      this.UserProfile = container.getComponent('UserProfile');
    }

  , termsView: function ()
    {
      var self = this;
      this.UserProfile.getUserProfile().then(function (profileData)
      {
        var view = new TermsAndConditionsMyAccountView
        ({
          application: self.application
        , UserProfile: profileData
        })

        view.showContent();
      });
    }
  })
});
We're setting the route to be update-terms-and-conditions so that when a user requests that path, it will trigger our termsView() method, which will return our view.
After setting some important properties in the initialize() method, we move onto the method that renders our view.
Remember what I said: profile data requests need to be handled like they're promises / deferred objects, so before we do anything with its data, we need to make sure that we have it first. Thus, before we can construct a view and tell it to render, we enclose everything in some code that calls the user's profile data. Once we have it, return a soon-to-be-defined view, passing it the application object and the profile data. Then we tell it to render.
Create the View
Tell it to render... what? Our new view of course.
We essentially have two things we need to do: render a template, and send it a flag to indicate whether the user has got the custom field set.
To achieve this, create JavaScript/Example.TermsAndConditions.TermsAndConditions.MyAccount.View.js and in it put:
define('Example.TermsAndConditions.TermsAndConditions.MyAccount.View'
, [
    'Backbone'
  , 'example_termsandconditions_termsandconditions_myaccount.tpl'
  ]
, function
  (
    Backbone
  , example_termsandconditions_termsandconditions_myaccount_tpl
  )
{
  'use strict';

  return Backbone.View.extend({
    template: example_termsandconditions_termsandconditions_myaccount_tpl

  , getContext: function ()
    {
      var termsAndConditions = _.find(this.options.UserProfile.customfields, function(field)
      {
        return field.id == 'custentity_tsandcs'
      });

      return {
        termsAndConditions: !!termsAndConditions
      }
    }
  })
});
After returning a template, we generate the flag. To do this, we search through the custom fields array, attempting to match against an object that has our ID. Once we have that, we double-negate it so that we have a true/false value. This might be a little unnecessary, but the find() statement will return undefined if it doesn't find the specified object, and while it is technically a falsy value, I'd much prefer an explicit true/false.
Create the Template
The final bit of this is to render a template so that it shows different content based on the value of this flag. For the purposes of this demonstration, we're just going to keep it simple: thank the user if the value is true; ask them to contact support if it's not.
Create Templates > example_termsandconditions_termsandconditions_myaccount.tpl and in it put:
<h1>Terms and Conditions</h1>
{{#if termsAndConditions}}
    <p>{{translate 'Thank you for agreeing to our site\'s <a data-touchpoint="home" data-hashtag="#/terms-and-conditions">Terms and Conditions</a>'}}.</p>
{{else}}
    <p>{{translate 'You have not agreed to our site\'s <a data-touchpoint="home" data-hashtag="#/terms-and-conditions">Terms and Conditions</a>. Please contact support.'}}</p>
{{/if}}
Nothing too complicated here at all. The only things to note are we are again using special data parameters on the anchor tags to link to the terms and conditions, and that we put a backslash before the apostrophe in our strings so that they are escaped.
Save and Test
Save all the files and restart your local server. Log into an account that has the custom field set to true (or register a new one!). When you're in the My Account application, change the URL so that you're visiting the local version of the SSP and that the URL fragment is /#update-terms-and-conditions. You should see something like this:
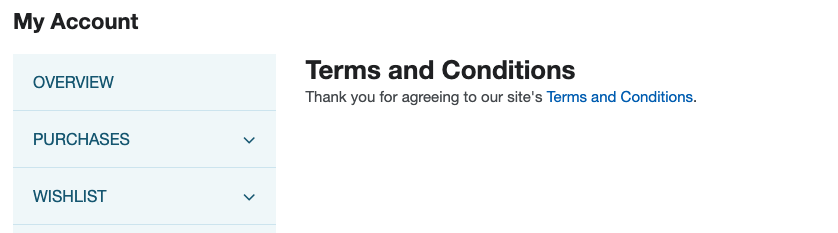
Log out and try again, this time with a user that has not set this value to true. Note that you can change the value of the same user, but you should log out and then log back in after changing the value. If the alternative message shows, then you're good!
Add a Link in My Account's Left Menu
The final core part of this demonstration is for us to add a link to the page in the navigation bar. For that, we're going to use the aforementioned MyAccountMenu component. Before we do, just a note: this component only adds entries/groups to the sidebar in the account area — it doesn't modify the links in the header nav.
The component has two key methods: one to add to a group and one to add entries to groups. Our functionality is just a simple page that fits easily into the Settings group, so I won't demonstrate how to add a group (but, to be honest, its pattern is very similar to the one for entries).
I'm going to add new code to the entry point file, because I want it to run when the module is mounted to the application — you could add it in further down the execution chain, but note that it won't add the menu item until it is called (obviously). For example, if you were to put the code into your view, it would only add the menu item after the route was triggered (ie after the user has already visited the page), which is not what we want.
Also note that this demonstration doesn't require the checking of permissions, so I won't be demontrating that. Permission checks are an optional advanced feature of the functionality, so, if you're interested, read up on them in the documentation.
Update the My Account Entry Point
To create a new entry in the menu is relatively straightforward:
- Create an object to represent how you want the entry to behave
- Use the MyAccountMenu component's method to add it
Once the method has been called and the object verified, the menu will automatically update to include your new entry.
Open Example.TermsAndConditions.TermsAndConditions.MyAccount.js and replace the mounToApp property with this:
mountToApp: function mountToApp (container)
{
  var MyAccountMenu = container.getComponent('MyAccountMenu');

  var termsAndConditionsGroupEntry = {
    id: 'termsandconditions'
  , groupid: 'settings'
  , index: 99
  , url: 'update-terms-and-conditions'
  , name: _.translate('Terms and Conditions')
  }

  MyAccountMenu.addGroupEntry(termsAndConditionsGroupEntry);

  return new TermsAndConditionsMyAccountRouter(container)
}
Here's some explanations on what I've chosen here:
id— can be more or less what you want, just as long as it doesn't clash with the ID of another entry in the groupgroupid— this is the group you want to add it to, and you can quickly find the menu IDs by inspecting the group's node and reading itsdata-idattribute valueindex— very low numbers put it towards the top (overriding the default entry in that index position) and high numbers towards the bottom (just remember that indexes start at 0)url— the documentation's example includes a slash before the fragment, but in testing it myself I found that this leads to unexpected behavior in some cases, but omitting it doesn't (so I'd stick with just the fragment)name— just like the rest of the code, you can use thetranslatefunction to ensure your strings are multi-lingual
As previously noted, I have not included a permission schema with this as it is not required.
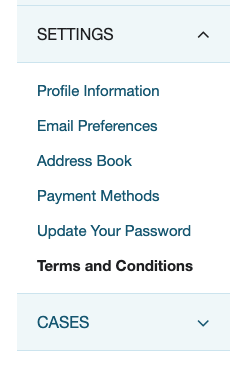
Save. With your local server running, visit a logged-in user's account area and expand the Settings menu group. You should see your new menu item in it — when you click it, you should go to your new page!
And that's kinda it.
Final Thoughts
So, we've touched three of the new components in the extensibility API. This tutorial was a demonstration of how they work. The prism through which we experimented with them was a hypothetical custom entity field whose value we wanted to capture on the registration form and later view in another part of the site. We achieved that using three new components.
Going forward, if you'd like to add in more customizations, you could add something to the My Account area functionality so that it's possible for the user to submit a form to set the value (ie so that they don't have to contact support).
Also, if you are pursuing this functionality for your site, you'll probably need a way to handle customers who have either registered before you introduced the checks, or have slipped through without agreeing. For this, you will probably need some sort of backend validation that checks during checkout and blocks it if unset before the shopper is allowed to submit the order.
The final code for this example can be found in GitHub.
Code samples are licensed under the Universal Permissive License (UPL), and may rely on Third-Party Licenses