Events
Caution: this content was last updated over 3 years ago
Events let you trigger code at certain points in the user’s journey or application execution. They are used to execute code automatically at specific times, such as when a view has been loaded, or manually when a user performs an action, such as modifying a data model.
Support for events within JavaScript is widespread: not just natively in its specification, but also throughout multiple libraries and proprietary code. They are very useful for developers as they let you hook into code execution and make modifications, without modifying the core code itself.
In many cases, there is support for events that fire before the rest of the code executes (which can let you block/cancel that execution, or modify the data it will use), and after the event, which can be useful for chaining callbacks and hooking in additional services.
Where You Can Use Events
Here are some of the places you can use events:
- DOM / jQuery — when a user performs an action in the interface
- Frontend JavaScript / Backbone — when an object (such as a view or model) is created, loaded, rendered, appended, etc, or when its properties are changed (eg a data model);
- Extensibility API — a hybrid of the first two, but when a SuiteCommerce-specific action happens (eg add to cart, change item quantity, etc)
- Backend JavaScript — when a model or service controller’s methods are called
Anatomy of an Event Handler
There are three key components of events that you should be aware of:
- Binding — the object that will do the listening, such as a router, view, model or collection (in many cases, you are telling an object to listen to itself)
- Event — the thing that will happen, such as a change in data, or a user clicking a button
- Callback — the code that you want to execute when the trigger has been fired
There are also some keywords associated with the handlers themselves:
.on(event, callback)— adds a new event listener (passing in the event and callback).off([event], [callback])— removes existing event listeners (or, optionally, passing in a specific event and callback to remove).trigger(event, [args])— manually causes the specified event (optionally passing in any arguments)
Quick Demonstration
I will go into a lot of detail in this post, so I’m going to start with a quick demonstration to give you an idea. For this, I’m going to use Backbone. Accordingly, it is advisable that you read the vendor’s documentation on events.
Backbone provides a module for handling events called Backbone.Events, which can be mixed into any object. By default, it is mixed into all the standard Backbone objects we use, so the pattern for using them is standardized across all of them.
Visit your site and then open the developer console. Execute the following code (either all at once, or individually if you want to step through it).
// Create an example Backbone object
var model = new Backbone.Model;

// Create a property and value
model.set('name', 'Steve');

// Create an event that listens to when this value changes and then does something
model.on('change:name', function () {console.log(this.name + ' is the best')})

// Trigger it
model.set('name', 'Laura');

// Returned value
// > Laura is the best
Binding Events
The most common scenario is that an object will listen to a change to a property belonging to itself. However, you should know it is also possible to tell one object to listen to the properties of another object.
The simple example above follows the pattern of:
<object>.on('<event>', <callback>)
This is very useful for when you want to listen to a data model and want to perform an action when a particular property changes.
Note that the event can be an event keyword only, or, in some cases, a map. In my example, I could have used change as the triggering event rather than change:name, therefore triggering when any property changes, instead of just the name property.
If you want to tell an object to listen to a property of another object, then you need to use listenTo() instead of on(), like this:
<object>.listenTo('<other object>', '<event>', <callback>)
This is not used very often, however.
View-Specific Events
Because views interface with the template, which is what ultimately gets rendered and shown to the user, views also accept standard DOM/JavaScript events. This is so you can, for example, bind a callback that sends data to NetSuite when a user submits a form.
The Backbone documentation has a special section on view-specific events.
In views, this takes the form of a hash. For example:
events: {
    'submit form': 'saveForm',
    'click button[data-action="remove"]': 'deleteRecord',
    'change [data-action="selectstate"]': 'eraseZipCode'
}
While all of these events would not likely to be on the same view, I included them all to give you an idea of some possibilities.
The callbacks are named and then, further down in the file, given definitions, or defined in the view the current view extends from. For example, saveForm is a standardized method attached to the Backbone.FormView module, which handles the process of sending the data to the model. If your view has Backbone.FormView.add(this) in its initialize() method, then it will gain access to its methods.
This events hash is bound to the view before the initialize() method is called, which means you can, if you want, call an event in your initialize() function if you want.
Events/Triggers
The event or trigger is the thing will happen, which cause the provided callback code to run.
In the sections above, I have already shown some possible event triggers to give you some ideas. Sorry to repeat myself, but once again, if you are writing Backbone events, you should refer to the their docs on this, as they have a complete catalog of events.
When declaring your event, you can specify a single event, or you can specify multiple ones (which will then all use the same callback). For example:
var self = this;
this.collection.on('reset sync add remove change destroy', function () {
    self.render();
});

// Or

this.model.on('sync change destroy reset add', function () {
  Backbone.history.navigate('myListPage', {trigger: true});
});
In the first example, a collection has been bound to a view, which means that we are probably on a list page of some sort (eg showing a list of orders). This code will listen for a change to the data collection and, if there is one, re-render the page. This is useful if, for example, a user deletes a record in the list and we want to re-render the page to show the new list.
The second example is quite similar: in this case, a user might be on the details view when they trigger a record change (eg change some values, delete it, re-submit it, etc) and, since we want to replicate the functionality, we’re going to, instead, trigger the route for the list page (with myListPage being whatever the path to your list page is).
Route/Hash Change
In addition to using Backbone to listen to model and collection changes, you can also use Backbone to listen to changes to the route/hash.
For example, if you want to execute some code whenever the user navigates to a different part of the site, then you could do the following:
var self = this;
Backbone.history.on('route', function () {
    // Log where the user is
    console.log('New user location:', Backbone.history.location.hash);

    // Or perhaps you want to re-render self
    self.render()
})
This example is essentially an example of how Backbone implements something similar to onhashchange.
Options and Parameters
The change and route Backbone events also let you be specific, if you want to track a particular property of the model or path in the router.
I won’t reproduce the code here, but a good example of this is in the Transaction.Model module, where we track changes to specific properties, such as the item lines, payment methods, shipping methods, et al.
With routes, you can listen for any route or something specific, but we don’t use that. Usually, there’s a better way of doing it than binding something to a specific route.
Custom SuiteCommerce Events
When a standard UI event is triggered, it’s because the user has done that thing — eg click happens when the user clicks. With Backbone, they have their own custom events that make sense within the Backbone framework. Accordingly, we have implemented our own custom events that happen within SuiteCommerce and SuiteCommerce Advanced.
These events are automatically triggered at various points in the application’s loading and executing of modules:
| Event | Object |
|---|---|
| beforeStart | application |
| afterModulesLoaded | application |
| afterStart | application |
| beforeRender | layout |
| afterRender | layout |
| beforeAppendToDom | layout |
| afterAppendToDom | layout |
| beforeAppendView | layout |
| afterAppendView | layout |
| renderEnhancedPageContent | layout |
| beforeViewRender | view |
| afterViewRender | view |
| beforeCompositeViewRender | view |
| afterCompositeViewRender | view |
| saveCompleted | model (form) |
| cms:rendered | SMTs (online) or Backbone.Events (local) |
The table is roughly in order they are executed.
Example: beforeRender
When an extension’s mountToApp() is called, the DOM is not ready and the rendering process has not yet begun. This might be problematic because you want to do something to the layout, or just simply access data about elements that will be rendered. In these cases, you could listen for the layout object to start rendering and then do something.
define('Example.Extension', [], function () {
    'use strict';

    return {
        mountToApp: function mountToApp (container) {
            container.getLayout().on('beforeRender', function () {
                console.log('The layout has started its rendering process!')
            });
        }
    }
});
Example: afterViewRender
This code sample is only applicable for SuiteCommerce Advanced, but you can use
afterViewRenderin other circumstances.
In this theoretical example, we have been asked to perform some sort of update operation on the email input field on the page for creating a new case.
define('Case.Create.View.UpdateEmailInputState', [
    'Case.Create.View'
    'underscore'
], function (
    CaseCreateView
    _
) {
    'use strict';

    _.extend(CaseCreateView.prototype, {
        initialize: _.wrap(CaseCreateView.prototype.initialize, function (fn, options) {
            fn.apply(this, _.toArray(arguments).slice(1));

            var self = this;
            this.on('afterViewRender', function () {
                self.updateEmailInputState();
            });
        }),

        updateEmailInputState: function () {
          // Do something
        }
    });
});
Create Your Own Custom Events
Using Backbone or jQuery, it is very easy to write your own custom events. Bind them with on() and then use them with trigger().
// Create a simple object
var obj = {};

// Mix in the Backbone.Events module
_.extend(obj, Backbone.Events);

// Create a custom event
obj.on('annoyUser', function () {alert('CAN WE BE FRIENDS?')});

// Trigger it
obj.trigger('annoyUser');
Of course, you can skip the first two steps if you’re working with an existing Backbone object.
Add jQuery to the mix: instead of binding it to a JavaScript object, you can bind it to the view’s DOM object (this.$el), or use the events hash.
For example, in my view, I could put this:
events: {
    'friends': 'annoyUser'
},

annoyUser: function annoyUser () {
    alert('CAN WE BE FRIENDS?');
}
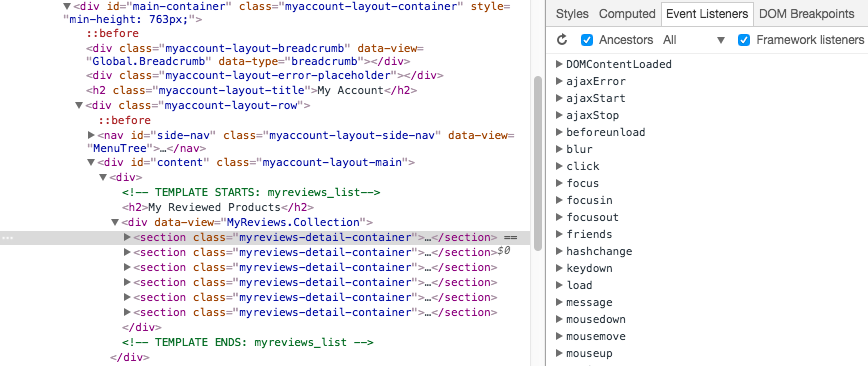
jQuery will then bind this to the view, which you can see in your browser’s developer tools.
Then, I can write code like this:
initialize: function initialize () {
    this.$el.trigger('friends');
}
Thus we have a custom event called ‘friends’. If you’re writing a custom module and you want to make it extensible, then you might want add ‘before’ and ‘after’ triggers to your modules’ methods
Extensibility API Events
All ‘visual’ components in the extensibility API have access to events. These are specific to the context of these components; eg, the PDP component has custom events we have created for typical actions that may be performed on a product detail page.
Some of these events are ‘cancelable events’, which are events that trigger before an action can run and can be used to prevent that action from executing. Others occurs after the specified event, which means that they allow the action to execute normally, but allow you to hook in additional code and chain it together.
I will give some examples, but, for more information, you should read our extensibility API documentation on how to use them in general. You should also delve into specific components’ sections for more information on those areas.
PDP Example: Enforce a Maximum Quantity of an Item per Customer
In this theoretical example, we want to prevent customers from adding more than five of a particular item to the cart.
(Note that is quite a flimsy solution for this problem: you should also add in some robust validation to the backend to prevent checkout, but there’s no reason why this can’t be used as part of the user-friendly frontend solution.)
define('Example.MaximumQuantity', [
    'jQuery'
], function (
    jQuery
) {
    'use strict';

    return {
        mountToApp: function mountToApp (container) {
            var PDP = container.getComponent('PDP');

            if (PDP) {
                PDP.cancelableOn('beforeQuantityChange', function preventMoreThanFive (quantity) {
                    if (quantity > 5) {
                        PDP.showMessage({
                            message: 'Sorry, you\'re only allowed a maximum of five of this item',
                            type: 'error',
                            selector: 'Notifications',
                            timeout: 10000
                        })
                        return new jQuery.Deferred().reject()
                    }
                });
            }
        }
    }
});
This code fires when the user tries to change the quantity, shows an error message (in the data-view="Notifications" placeholder), and then cancels the action by returning a rejected deferred object. The message is automatically hidden after 10 seconds.
PDP Example: Prevent the User from Selecting Options by Throwing a Console Error
In addition to showing an error message using a rejected deferred object, you can also just throw an error. Throwing an error is the simplest, but probably the ugliest, way of blocking something happening. However, it, at least, serves as a useful way of illustrating how to use an event in the extensibility API.
PDP.cancelableOn('beforeOptionSelection', function rejectSelectOption ()
{
  throw new Error('No option changing!');
});
So, very simply, we are adding an event listener for when a user selects an option on a product page (eg size or color) and then interrupts them by throwing a console error. This blocks the user selection from taking place. (Although, it's not fullproof as they could still change the options via URL, but you get the idea.)

Cart Example: Create a Confirmation Modal When a User Adds a Promotion Code
OK, this one is a little more meatier. When a shopper enters a coupon code and hits submit, it is immediately sent to NetSuite for processing. But what if we wanted to interrupt that process and create a confirmation dialog so that when they submit a code, they're first asked whether they're sure they want to do it? If they click yes, the submission is released and flies off to the server; if they click cancel, the submission is canceled and an error message is shown instead.
Note, for this, we need to add two dependencies: jQuery (as jQuery) and GlobalViews.Confirmation.View (as ConfirmationView).
var Cart = container.getComponent('Cart');
Cart.cancelableOn('beforeAddPromotion', function confirmPromo ()
{
  var deferred = jQuery.Deferred();

  function resolvePromise ()
  {
    return deferred.resolve()
  };

  function rejectPromise ()
  {
    var key = ['errorMessage'];

    deferred.responseText = '{\"errorMessage\": \"The coupon was not added because you canceled the request\"}'

    return deferred.reject(deferred, key)
  };

  var confirmation = new ConfirmationView(
  {
    title: 'Add Promotion?'
  , body: 'Are you sure you want to add this promo code?'
  , autohide: true
  , callBack: resolvePromise
  , cancelCallBack: rejectPromise
  });

  cart.application.getLayout().showInModal(confirmation);

  return deferred
});
So, this time we're creating and using deferred objects for real now as the confirmation modal supports callbacks but is itself asynchronous (ie, it does not interrupt a function but can be used to trigger new ones depending on what is clicked).
We start by setting up the conditions for what should happen when it is resolved (ie the user agrees) and when it is rejected (the user disagrees). In the first case, there is nothing to do, per se, as we're basically just letting the interrupted function continue. As for the case of rejected promises, we could just send a rejection (like we did with the resolution condition) but while we're here, we may as well take advantage of the fact that the promo code form accepts error messages as to why a code was rejected. This means that we can take advantage of a neat little UI feature; for that we need to create a pseudo-backend error.
Backend error messages are handled by ErrorManagement.ResponseErrorParser. The main function accepts two arguments: a jQuery XHR and an array of keys. A crucial factor of the jqXHR is that it must contain a value called responseText, which is a stringified object that contains at least an error message. The function parses the string and then goes through that object to find the first error message matching the key we provide it. Once it has that, it sends it off to the view to render.
So, if you look back at our code, you can see that what we are doing is first setting our (single-value) array up and then creating the response text. The response text is added to the deferred object, and then returned when we reject its resolution.
With all of that set up and ready to go, we can then move onto creating the confirmation dialog. We've discussed how to Show Content in a Modal (including confirmation modals) elsewhere, so we’ll skip the details. The short is: we have global views always available that standardize this type of functionality, making it super easy for developers to create new instances of them when they need them. So, once you've added GlobalViews.Confirmation.View as a dependency, you can invoke it using a view constructor.
After passing it some standard parameters, we add on two important ones: callBack and cancelCallBack — the first is what is called if the user agrees with the dialog's question; the second is what if they disagree.
Once we've constructed that view, we send it to the showInModal method of the layout to render it.
Finally, after that, the deferred object is returned as the final part of the event listener. What this means is that when this event is triggered, a pending deferred object is sent to the application, which blocks the process: it turns the asynchronous process of resolving a promo code into a synchronous one, and one that is contingent on making a decision in the dialog box. (One crucial thing to note is that clicking outside of the dialog, or clicking the close button does not return a rejection — rather annoyingly, this means that the form will become locked in a pending state.)
And that's it. If you run the code, you should see something like this:

🙌
Service Controller and Backend Model Events
If you’re trying to hook into an event not covered by the extensibility API, or if you’re using a version not recent enough to have access to it, then you can target the methods directly.
Since we introduced service controllers, we also introduced a module called SC.EventWrapper that wraps all service controller and model methods with before and after events. As your service controllers and models will extend from this module, they will inherit them.
To use them, you can write code like this:
// Pattern
<listening object>.on('<before/after>:<model/controller name>.<method>', function () {
    // your code here
});

// Example
Application.on('before:LiveOrder.submit', function () {
    // console.log('I will fire before the order is submitted!');

    // Prevent order from submitting
    if (someCondition) {
        var error = new Error();
        error.name = 'Validation failed!';
        throw error;
    }
});
This can help you customize base classes and hook in additional code to standard processes.
It can also be used to modify the data that is currently flowing through the process. For example, if you have some custom fields that need to be set:
Application.on('before:LiveOrder.addLine', function (model, currentLine) {
    if (currentLine && currentLine.options && !currentLine.options.custcol_my_cust_field) {
        currentLine.options.custcol_my_cust_field = "Oh hi Mark";
    }
});
Code samples are licensed under the Universal Permissive License (UPL), and may rely on Third-Party Licenses